Results 1 to 1 of 1
-
30th Jan 2017, 10:50 AM #1
 [Guide] How to Setup a BitCoin Mining Rig!
[font=Trebuchet MS]Today I've decided to spend a few hours creating this tutorial and help desk, it will be updated frequently and its to support all kinds of members varying from noobies to advanced miners.
Contests of this install guide:
1. How to get started in buying a mining rig, working out your budget and what GPU's to purchase for Scrpyt mining.
2. How to install these parts to the motherboard/ power supply.
3. How to set-up Teamviewer/Cgminer and install all the files needed to mine.
4. How to keep your Rig's cool and stable.
5. Best pools to use, and how to add a failover pool in-case your main one goes down.
6. My setup.
1. How to get started in buying a mining rig, working out your budget and what GPU's to purchase for Scrpyt mining.
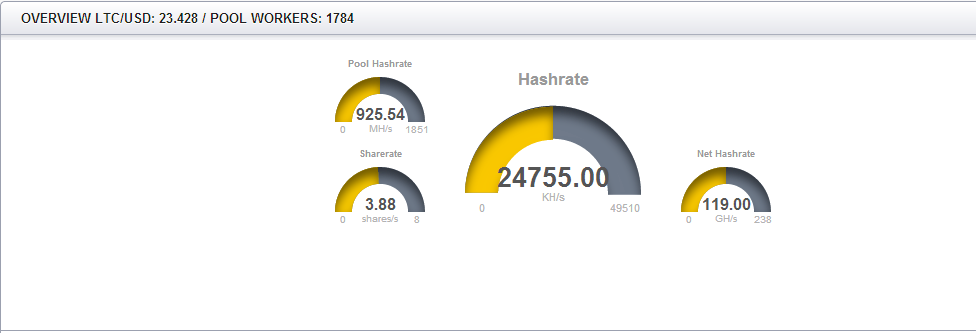
Okay lets begin! I'll be adding a few pictures of a couple of my rigs while creating this guide. I do have a total of 35,000 Khs, looking to get 80,000+ :)
Ok that's what i bought for a few rigs just to give you an idea, once you've ordered what you decided to go for wait for the parcels to be delivered.
Once the goods have been delivered we can begin to assemble our rig!
2. How to install these parts to the motherboard/ power supply.
First of all, we start with a place to put our rigs. We need them cool and out of the way since these bad boys will be on 24/7 bringing you in $$$.
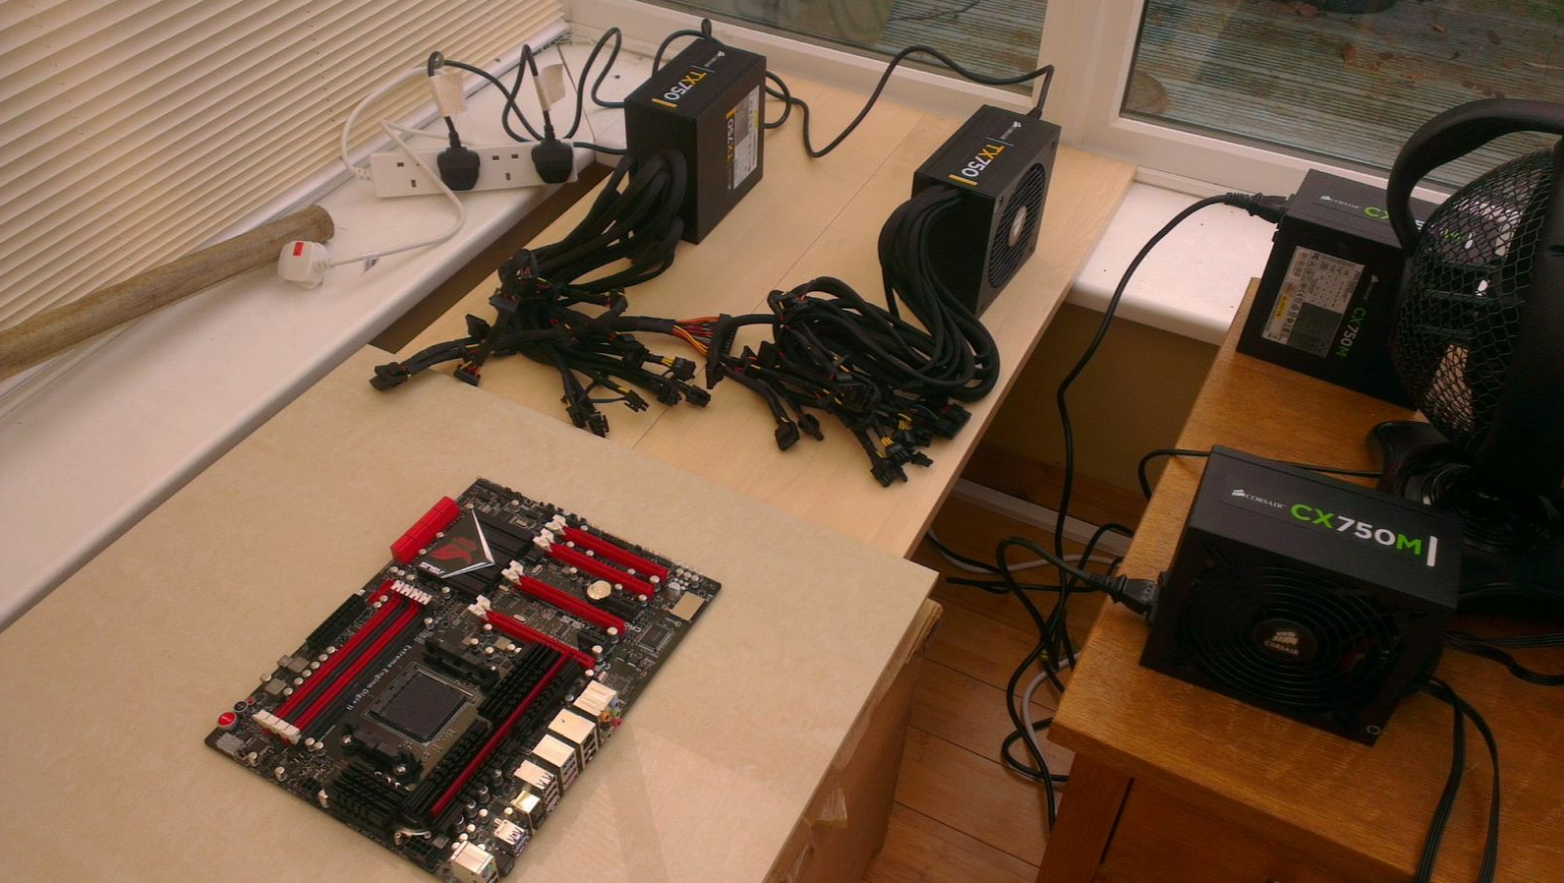
Once you've found where you can store them, you will need a few requirements to put the motherboard/psu's on. You could go with a simple desk but thats more money.. Here are just two of my NEW rigs when assembling:
Images of the setup

As you can see i am using the cardboard box for the main platform, and then two long pieces of wood to expend that platform for the Power supplies. I have a 5 tile to put the motherboard on, im using a tile since it's cold and can actually drop the temp by 3c.
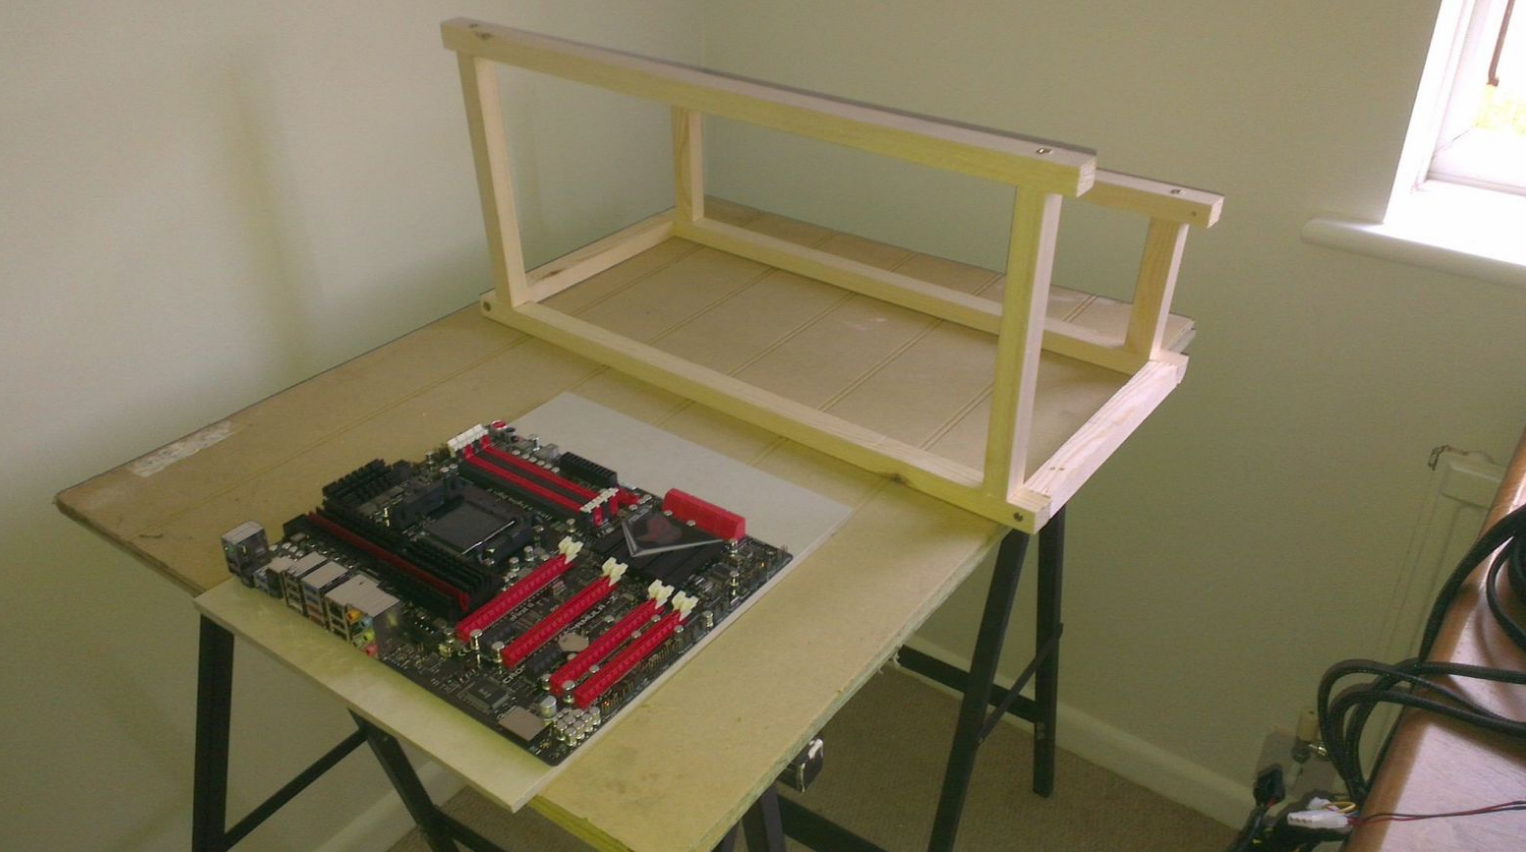
Here is another one of my rigs:

This time using a stand, then two 5 pieces of wood and another 5 tile to put the motherboard on :D
You can of course just use what you want, but just wanted to share with you guys what i did for this.
2a: Ok, now we have a good place and a good platform. Now we need a stand for the GPU's, i just made a stand using some cheap wood, you can see my design in the previous images.
Once thats sorted, we can now build our rig!
-First, we place the motherboard on the tile for example.
-now we can add the CPU and Ram to the mobo.
-then the dual power connector (thats of course if you have 2psu's)
-connect the power supplies to the connector.
-Add the riser cables to the pci-slots.
-Then place and mount the gpu's on the stand, here we can connect the riser cables to the gpu.
Then add the fan to the motherboard, (12v corsair, thats of course if you have one)
Finally add the cables from the PSU to the top of the gpu.
Add the Monitor to the Motherboard.
Thats it! Simple as that, once thats all connected.. We can now move on to adding Ubuntu or windows to the rig.
3. How to set-up Teamviewer/Cgminer and install all the files needed to mine.
This tutorial is for Ubuntu. I have updated this tutorial since all the tutorials out there are old and the links/commands do not work. Click the spolier for the setup guide for ubuntu and cgminer and how to make a headless miner.
------
1. Setup the system
3a: download Ubuntu 12.04.2 LTS image which can be found here: http://releases.ubuntu.com/precise/
- make the install iso - use:
http://unetbootin.sourceforge.net/
3b: Once you have extracted the ubuntu iso, and inserted it into your motherboard, power on your mobo and rapidly hit the delete key so you can get into the bio's settings. Here you will need to go to the settings tab which displays the boot setup, select your USB storage device.
- When you've installed Ubuntu, open up "Terminal"
2. Preparation
2a: Login as root, update the system and download necessary upgrades:
2b: Use the current commands:
-Now the Compiler files needed for this install.Code:sudo su apt-get update && apt-get upgrade
-Install additional tools like svn, git …
3. Install AMD Catalyst driversCode:sudo su apt-get install -y build-essential gcc make cmake mc python-dev subversion git bzip2 unzip
3a: After your computer reboots, you can verify that everything worked by typing:Code:sudo apt-get install fglrx-updates fglrx-amdcccle-updates fglrx-updates-dev sudo aticonfig --lsa sudo aticonfig --adapter=all --initial sudo reboot
3b: If you see all of your GPUs listed, with “hardware monitoring enabled” next to each, you’re good to go.Code:sudo aticonfig --adapter=all --odgt
4. Download CGMINER, APP SDK v2.9 with OpenCL™ & AMD SDK V 6.0
http://developer.amd.com/tools-and-s...downloads/#one
4a: Once download use the following commands:
4b: Now we can download Cgminer:Code:mkdir amdapp_2-9 cd amdapp_2-9 tar -zxvf ~/Downloads/AMD-APP-SDK-v2.9-lnx64.tgz sudo ./Install-AMD-APP.sh sudo reboot
4c: Download ADL SKD V 6.0Code:git clone -b 3.7 git://github.com/ckolivas/cgminer.git cgminer
http://developer.amd.com/tools-and-s...brary-adl-sdk/
-Once downloaded, use the following commands:
4d: Now just to be safe, while installing cgminer i would recommend downloaded all these commands i have added and researched from my own mistakes:Code:mkdir ADL_SDK cd ADL_SDK mv ~/Downloads/ADL_SDK_6.0.zip . unzip ADL_SDK_6.0.zip cp include/* ../cgminer/ADL_SDK
4e: Once thats all downloaded, we can now begin to make cgminer.Code:sudo apt-get install libtool sudo apt-get install libcurl4-openssl-dev pkg-config libtool libncurses5-dev libudev-dev screen xterm sudo apt-get install libcurl4-gnutls-dev sudo apt-get install autoconf sudo apt-get install -y build-essential gcc make cmake mc python-dev subversion git bzip2 unzip
-Once in the cgminer directory, use this command:Code:cd cgminer
4f: You will most likely get an error, but thats normal. Now use this command:Code:./autogen.sh && ./configure --enable-opencl --enable-scrypt && make
4g: Let linux do its thing. then you should get an option to Make install.Code:./configure --enable-opencl --enable-scrypt
4h: Once completed do the following command to check if its installed correctly:Code:sudo make install
Congratulations, thats cgminer installed. Now we can do the necessary setup and conf parameters needed for cgminer to run.Code:cd cgminer export DISPLAY=:0 export GPU_USE_SYNC_OBJECTS=1 ./cgminer -n
5. Install SSH, Curl, and package updates
5a: Download putty or teamviewer for remote desktop access, Putty is recommended:
http://the.earth.li/~sgtatham/putty/.../x86/putty.exe
5b: Install SSH by typing:
5c: Install Curl and package updates by typing (or copying & pasting into Putty) the following commands:Code:sudo apt-get install openssh-server byobu
5d: Once you've installed putty, you can now turn off the monitor on your rig and go on your main desktop to connect to your rig to copy and paste the following commands.Code:sudo apt-get install curl sudo apt-get update sudo apt-get upgrade
6. Create cgminer startup script
6a: create a new file for cgminer:Code:cd ..
6b: Once in the file copy and paste the following, make sure you edit the blanks which contain for example "Your username" change this, you will need to create a pool account to add a worker, i would recommend:Code:sudo nano cgminer_startup.sh
https://wdc.d2.cc
6c: Create a worker, then go back to the file and change the user and password.
6d: You can also change the parameters, the following code is good start for a r9 280x
-save the file by doing "CTRL O & then to exit do CTRL X"Code:#!/bin/sh export DISPLAY=:0 export GPU_MAX_ALLOC_PERCENT=100 export GPU_USE_SYNC_OBJECTS=1 cd /home/YOUR_XUBUNTU_USERNAME/cgminer ./cgminer --scrypt -I 13 --thread-concurrency 21712 -o stratum+tcp://wdc.d2.cc:3335 -u USERNAME -p PASSWORD
Once out of the file, do the following:
7. Create an alias to easily check on cgminerCode:sudo chmod +x cgminer_startup.sh
7a: Type the following into the terminal
7b: Scroll to the end of the file, and then add this text above the line that reads “# enable programmable completion…”Code:sudo nano .bashrc
7c: save and quit out of that file.Code:alias cgm='screen -x cgm'
8. Start the script by closing the terminal and re-opening it again.
8a: To start the script do the following command:
8b: It should now start up cgminer, give it a few mins. Once is fully loaded and you can see your temps, and accept shared. do the following commands.Code:./cgminer_startup.sh
Enter.Code:S
Enter.Code:W
8c: It should save you a conf. file, close cgminer by doing the following command.Code:Enter
CTRL C
8d: Once out of cgminer and back into the terminal, do the following command:
8e: You should now be in the conf file so you can edit all the parameters needed for you GPU setup. Once you've changed everything to your standards, exit the conf. fileCode:sudo nano /home/YOUR USERNAME HERE/.cgminer/cgminer.conf
CTRL O < Saves it.
CTRL C < Exit the file.
8f: Then open to run cgminer now, all you need to do is type cgminer into the terminal like this:
------Code:cgminer
Congratulations thats it! if you want some good parameters for you card contact me and ill be happy to help.
-Now we got the rigs up and running, we need to keep them cool and stable while they run for 24hours.
4. How to keep your rigs cool and stable
4a: To keep them low temps i would purchase a few fans, i would recommend the following:
Honeywell Black Tilt and Pivot Turbo Fan - 7 Inch.
4b: Keep your windows open, not to wide incase it rains and you dont want water on your mobo lol. Fans is the most efficient way and best solution to keeping them cool.
5. Best pools to use and most stable, just a few recommendations:
https://wdc.d2.cc
https://ltc.hashfaster.com/
http://poolerino.com/
Many more out there though, but these are the ones i use.
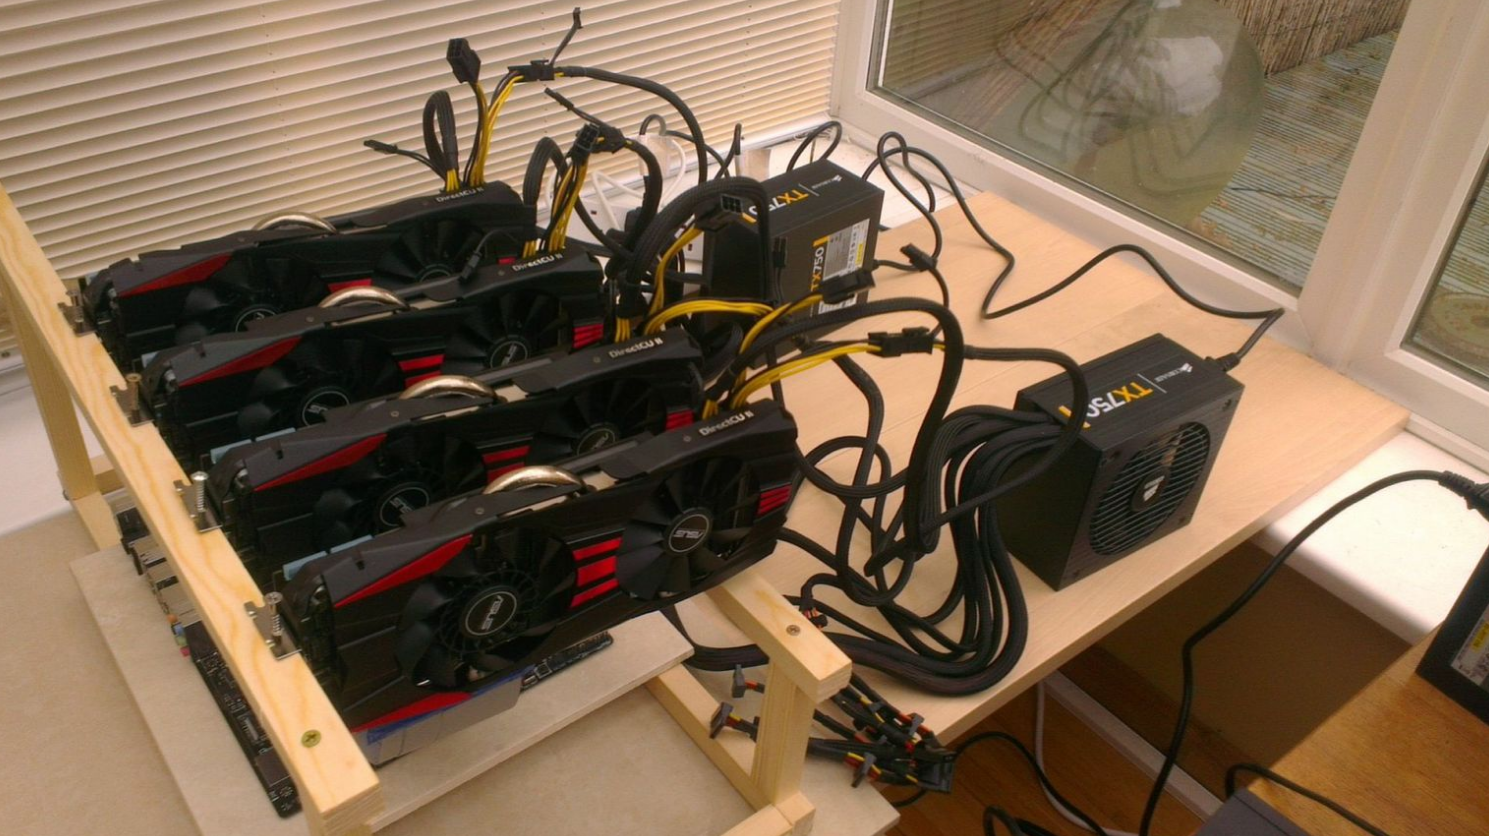
6. My Setup
here are a few images :)
7. Questions and answers?
feel free to contact me by posting below and i will answer them ASAP or contact me via PM.
Credits:
Crypto Miner @ HFKevin Reviewed by Kevin on . [Guide] How to Setup a BitCoin Mining Rig! https://i.imgur.com/87xKQqu.png Today I've decided to spend a few hours creating this tutorial and help desk, it will be updated frequently and its to support all kinds of members varying from noobies to advanced miners. Contests of this install guide: 1. How to get started in buying a mining rig, working out your budget and what GPU's to purchase for Scrpyt mining. 2. How to install these parts to the motherboard/ power supply. 3. How to set-up Teamviewer/Cgminer and install all Rating: 5Last edited by Kevin; 30th Jan 2017 at 10:57 AM.
Sponsored Links
Thread Information
Users Browsing this Thread
There are currently 1 users browsing this thread. (0 members and 1 guests)
Similar Threads
-
[Guide] Everything About Ebay Bidding Noob Friendly
By Kevin in forum EbayReplies: 0Last Post: 13th Oct 2016, 02:28 PM -
How To Find Great Writers At A Cheap Price [Guide]
By InUsWeTrust in forum Cloaking and Content GeneratorsReplies: 1Last Post: 4th Oct 2016, 04:39 AM -
New, pools of a joint mining.
By coins in forum Mining and PoolsReplies: 0Last Post: 8th Apr 2016, 10:23 AM -
Mining of crypto-currencies on P2pool
By kryptonite in forum Mining and PoolsReplies: 0Last Post: 13th Jan 2016, 02:42 PM -
[Guide] Facebook Group Posting And Making Money Easily!
By EasyMoney in forum Making MoneyReplies: 0Last Post: 6th Oct 2015, 03:43 PM


 Reply With Quote


 Staff Online
Vn5socks.net 21-11-2024 | socks 5...
Live | 107.180.107.116:41716 | United States |...